


Sew Along with ALD Quick Sew Edition: Candy Pants
- Laura Frost

- May 22, 2020
- 6 min read
Hi everyone! Welcome to the Quick Sew Edition of #SALwithALD. The Mod Squad at Amelia Lane Designs each selected a quick sew pattern to feature each day, with lots of cool prizes to win along the way. Join us in the Facebook Group to play along and enter to win!

For today's quick sew, I picked the Candy Yoga Pants from 5 out of 4 patterns.


All you need to sew these up is:
fabric cutting tools - I use a rotary mat, hard ruler and rotary cutter
about yard of knit fabric - athletics are my favorite
sewing machine or serger - I usually use my serger, but you can easily do the entire thing using a stretch stitch on a sewing machine. I also like to use my coverstitch to flatlock the seams but you could easily top stitch on a sewing machine.
Some elastic if desired
Let's get started!

Sorry for my messy workstation but I wanted to show the whole cut of fabric. This is a 1.5 yard cut of Siren athletic fabric. My pattern pieces are folded down to the capri length and I hacked my waistband to be cut on the fold rather than two mirror image sets. Even so, in size 2XL I'm barely using more than a yard of fabric.

Once you have all the pieces cut out (Yes, suddenly switching fabric lol), I like to pin the waistband and get it ready to sew up and I'm trying to train myself to put my pattern pieces away as soon as I undo them from their fabric.


I like to put washaway tape on the front bottom of my pocket pieces (where it will attach to the side panel) and where I'll be hemming the top. There's a guide on the pattern piece that helps line up the pocket.
As a sidenote, I have an iPhone 8+ (thank you to my brother for the amazing handmedown or I'd still have my 5s). It's bigger because it's the plus size (and I'll never go back!) so per the pattern instructions, I lengthened my pocket to accommodate. I like my pocket to hang over the top of my phone about a 1/2 inch so it doesn't fall out when we go upside down on the Incredicoaster at Disneyland. I lengthened my pocket about an inch to perfect that fit. I still line up the top of the pocket with the pattern placement lines so that my little t-rex arms can reach the top of the pocket :-)

Okay, back on track, you can see I've attached my pockets to the side panels and now I'm sandwiching my sidepanels between the back and front legs and going to sew up the side seams. I personally like my candy pants more athletic than relaxed (both fits available in the pattern) and so I flatlock (or topstitch) the seams here because I expect lots of negative ease and don't want to see my serger threads showing through.
After doing the panel seams, I like to just pin up the inside leg seams while I'm sitting at my serger. Sew those up really quick and then it's time for the gusset.

The Candy pattern includes, no gusset, half gusset and full gusset options. Before the Candy pattern released I was a big user of the FREE ninja pattern so the full gusset is normal to me. So that's what I used. It's pretty easy once you memorize which way the gusset goes. That took me awhile when I was new. The long part is the up and down and the narrower part is the side to side. I flip one leg right side out, pop the gusset on and sew, then shove that leg inside the other leg, matching up the inside leg seams and pin around the crotch.

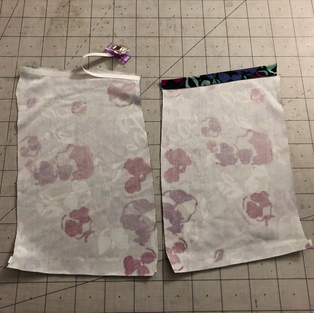
Here's where my right side out leg is inside my inside out leg with the seams alighted and I've pinned it all together. The gusset is in there too, it's what's pinned at the center seam.

Then it's time to install the waistband. I like the contour waistband fit with the ease of the knit waistband option, so I've hacked mine, but all of the waistband options included are great. I am also going to use 1 3/4" elastic in mine. So I sew my elastic in a loop and put it inside my waistband, then fold my waistband over the elastic so it's enclosed and attach the waistband like a regular knit waistband. The pattern instructions have a different method and my method has some flaws for sure (the elastic isn't tacked down so it can twist and be annoying) but I'd rather have quick than perfect since I always seem to be still sewing when I should already be packed for a trip! I have defiantly been finishing a hem five minutes AFTER I should have left for the airport already! So far so good on the elastic not twisting though.

The last step is to hem the legs and you're done!
Notes on fitting:

Pictured here is my original muslin.
Top: Nancy Raglan
Bottoms: Candy pants in capri
Headband: From Emily's sewalong
Fabric: Arbor Triathlon Tricot and Copper Tricot (in the athletics section)
Fitting options: I used the high rise, contour waist per the pattern pieces and assembly and I liked the height of the rise but I found that I am getting a lot of pooch below the waistband because my pooch is only covered by one layer of fabric. I also found some wrinkling in the knees. I did not flatlock the sidepanel seams.

Here's my second draft
Top: Nancy Raglan
Bottoms: Candy pants in capri
Fabric: Steel lightweight athletic brushed poly and a polyester heavy performance (both in the athletics section)
Fitting changes: The only change I made between drafts 1 and 2 was to use the midrise instead of the highrise and to flatlock the sidepanel seams. (I think I also lengthened the pocket here) I thought perhaps the tricot was too lightweight. The heavier athletic is great for more compression and the flat locking seams really helped too. I still had wrinkles in my knees and sometimes I feel like the crotch is falling down to my knees. I had more support on my pooch but I felt like my pants were falling down and I was getting a muffin top.

Third time's the charm.
Top: Michelle Fitted Tee
Bottoms: Candy pants in capri
Fabric: Shiny purple tricot from an athletic mystery box and Siren nylon performance (both in the athletics section)
For my third pair, I still used the midrise cut line, but I added height to the waistband. This way I had the double layer stability over my front pooch but also the height of the rise that made me feel like they'll stay up. Since I was adjusting the waistband anyway, I went ahead and made it cut on fold. I measured the long parts of the contour waistband, the short parts of the contour waistband and connected the dots. So my pattern piece has a more exaggerated triangle shape on the ends that you sew together. The higher part of my waist where the folded over waistband sits is narrower than the hip part of my body where the waistband attaches to the pants, so the pattern piece needs to be wider on the top and bottom with less width in the center of the height of the waistband pattern piece.
I also folded over my pattern piece about a 1/2 inch in the knee. The calf and thigh both fit okay but I just had extra length in my knee that I removed to remove the wrinkling.
Here's a quick quick video on how I folded my pattern piece to remove the wrinkles in my knees.

Fourth pair - just when you think you're getting good!
Top: Michelle Fitted Tee
Bottoms: Candy pants in capri
Fabric: Shiny purple tricot from an athletic mystery box and Haven- feels like tricot (both in the athletics section)
Exact same as the third pair except I tried to lengthen them to be closer to the ankle but not quite. I succeeded on 2 out of 3 pieces. So I had to shorten the other two pieces. No idea how that happened. But I ended up with kind of a cool shape where the outside leg is longer than the inside leg. I'm into it though.
Thanks for joining me today, and I hope you'll check back in to see what the rest of the team has in store! I'll drop the rest of the schedule below.
Tuesday: Jan Allison with the Rad Lucky Undies
Wednesday: Sarah Kaprelian with Winter Wear and Ellie and Mac scrunchies
Thursday: Shakita Cook with Happy Hippos Embrace Cloth Pad
Friday: Laura Frost with 5 out of 4 Candy Yoga Pants
Saturday: Brittanie Naranjo with Brindille & Twig Ringer Tee
This post contains affiliate links. Thank you for your support!


Comments