Lengthen Your Patterns
- Jan Allison

- Nov 1, 2019
- 5 min read
Updated: Nov 2, 2019

Hello, all! I'm Jan and I usually blog at Rolling Stop Creations. Today, I'm on the blog here at Amelia Lane to show you my favorite way to lengthen a pattern!
I'm 5'11" and adding length is a must for me. Not only does it make a pattern fit the way the designer intended, but it allows you to really shine in your me made makes that fit perfectly for you!

I'll show you a couple of pictures for comparison. The Dream Tee is drafted for a height of 5'6". I sewed this one exactly as the pattern is designed, with the only modification being that I graded between sizes where needed. To the naked eye, it's fine. It fits as it should. However, as the person IN the shirt, I can tell you there are some issues. The "waist" of the shirt is hitting me about 2" higher than it should, causing it to feel snug around my ribs. Also, because it is more snug there than it should be, the hem is pulling out to the sides a bit and giving more of a flared effect around my hips than I'd prefer.

This version, I split the pattern and added the length I was missing. The waist now hits me at my natural waist, giving me a more room around the ribs and making the shirt SO much more comfortable. The hem is laying better across my hips and hits at a more flattering place. The biggest advantage though, is that I can raise my hands above my waist or bend over without flashing a few inches of my midriff. So not only does the shirt look better and fit more comfortably, it makes me feel great wearing it!
When adding length to a pattern, I like to get everything assembled and cut out first. It's helps me see where I need length and where I don't. Like a lot of tall people, I have a long torso, but that's where most of my height is. On a pants pattern, for example, I might not need to add length at all, but on most tops, I need to make them longer. Once you've got all your pattern pieces, go ahead and look at them. Hold them up to yourself in the mirror. Compare them to a favorite garment in a similar style. The goal is to have something that fits you perfectly, so if the pattern looks to be just right as is, don't feel like you HAVE to add length just because you have longer proportions.
When adding length, the only additional tools you need are a straight edge (I use a clear 18" x 2" quilting ruler), something to write on your pattern, and some tape. I do prefer tape to glue for this because it's easier to reposition if needed, but you can use whichever you prefer working with.

Since Amelia Lane Designs has just released the Dream Tee (and I'm a little obsessed with it), we'll use that pattern to walk thru the process.
First, many patterns you'll find have a handy dandy line on them that show you where the best place to add length for most people is on the pattern. If a pattern doesn't have that line, you can determine it on your own very easily. I usually take my pattern piece, and draw the line for myself about an inch below the narrowest point under the bust of the pattern. Once you've decided where to start hacking, the process is super easy to finish.

Cut your pattern apart along the line. I like to use a my clear quilting ruler to make sure the line is nice and straight.

Grab a piece of scrap paper. I like to piece together the cut off unused parts of the pattern and repurpose them when I can.

Take your scrap paper and cut it in half or piece it together however you need to to make a solid piece at least 4" longer than your pattern is wide. You'll also want to make sure that it is about 2" longer top to bottom than the amount of length you're adding. Mine ended up being about 5" long and 20" wide.

The next step seems small, but I've found that if I skip it or try to eyeball it, my lines don't end up being precise, and that's very important. Take your straight edge and draw a line across one of the short ends of your scrap strip. This will give you a nice straight starting point for adding inches and making sure that both of your pattern pieces end up lining up exactly as they did before.

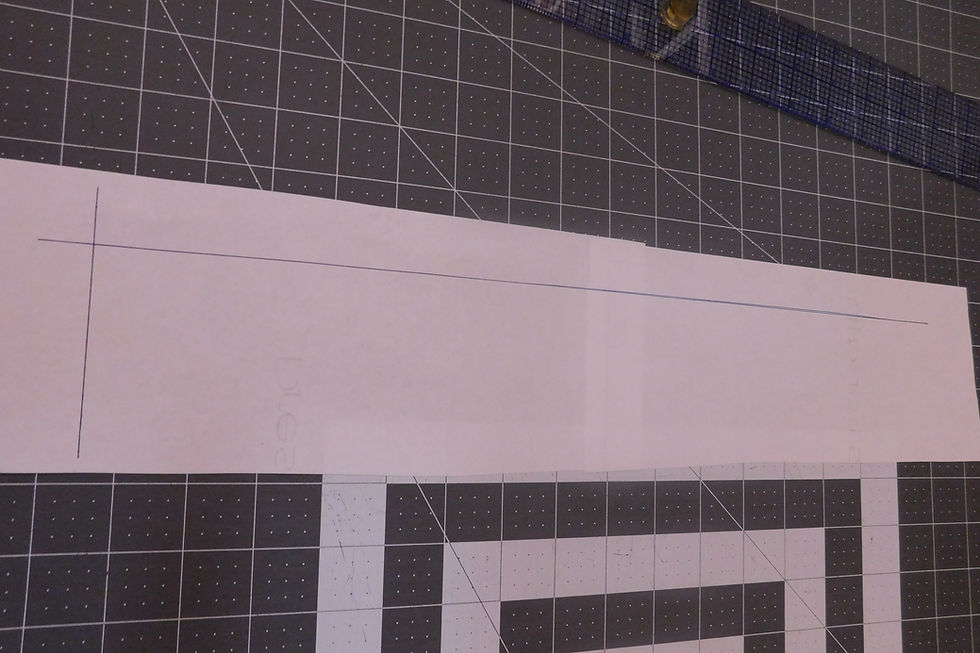
Take your straight edge, and draw yourself a line at a right angle from your starter line. Make sure that this line is perpendicular and makes a perfect square corner. I draw the line so that it is longer than the width of the pattern piece just to ensure it's easy to see.

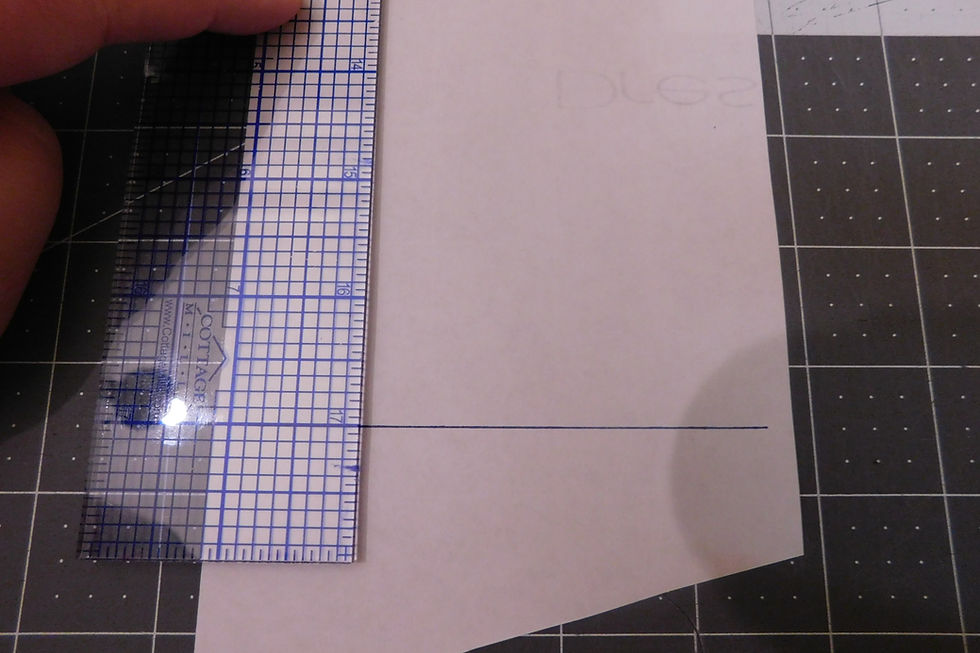
This is what your strip should look like at this point. Now we need to determine how much length to add! The Dream Tee pattern is drafted for someone who is 5'6" tall. For every full inch over that height, the standard is to add 1/2" in length. For example, I am 5'11", and that is a 5" difference, so I'll add 2.5" to my pattern. Someone who is 5' 7 1/2", is 1 1/2 inches taller than the drafted height, so they need to add 3/4 of an inch. Figure up how much you need to add, then measure that far from your long straight line.

Since I need to add 2.5", and my ruler is only 2" wide, I made myself a dashed line at 2" away from my long solid line to show me where to start measuring again to add the other 1/2". Your process may not be so tricky.

This is my finished strip!

Now it's time to put things back together. Take the straight edged corner of your pattern piece and line it up with the corner you made earlier with your lines. Make sure that your pattern piece lays exactly along the straight line and tape your pattern to your strip.

Place the other half of your pattern against the bottom line of your strip, carefully lining the "Fold" side up with your starter line again. This makes sure your pattern piece isn't distorted in any way and keeps the fit trued up. When you're sure you're good to go, tape the bottom in place.

Adding length can alter the edges of a pattern. I've highlighted here where the pattern pieces used to line up. See how they are now starting to head in different directions? Take your pencil and sketch a line that completes the side of the pattern piece. Don't connect the dots and line up the pattern where they used to meet, but draw a gradual curve that matches the lines of the design.

Trim away the excess paper using your sketched line.

Now you can go back and trim off the excess on the fold side.

And you're done! The Dream Tee is a paper saver, so the front and back are the same piece, but MANY patterns have a separate front and back piece to print. Make sure you add the same length to both as you go so that your finished piece comes out perfect!
Congratulations on making your personalized pattern adjustment! This method works on bodices, pants, sleeves, skirts, and everything else, so don't be afraid to adjust your patterns to get a tailored fit.
If you don't need to add length to a pattern, but rather need to remove it, check out Keri's post on how to make that adjustment here. Happy sewing!


Comments